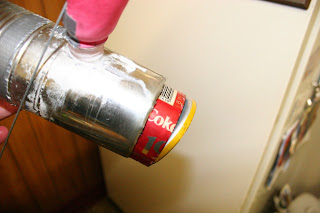
Change is always required when your engine seizes after only 55 seconds.
This one ran until the plastic bits caught fire.
Much better...

The autopsy also shows why my little engine stopped so suddenly. There is only around a quarter of an inch of air above and below the displacer when its at its extremities, and the bottom popping off made the displacer touch the bottom of the can it was in.
I replaced the can surrounding the displacer because I had to use a can opener to get the displacer out, and reattached the power piston balloon.

You punch a hole with a nail, then rip a circular hole with pointy nose pliers in much the same way as opening an old style tin can of fish that the eater would open with a key.
If you arent old enough to know what Im talking about it, count yourself lucky and get on with it. You havent missed a thing.

Apparently this works, and acts as a thing called a regenerator.
A regenerator can often be found on a Stirling engine and acts to store heat between the hot and cold sections as the air moves between the two.
The regenerator material collects heat from the freshly heated air inside the can the displacer is in. As the heat is displaced from the hot section to the cold section, some heat is removed and stored in the material. This is a good thing, because we want the cold side of the equation to be as cooled as possible. When the cooled air returns to the hot end, it picks up the heat it dropped into the regenerator on the way through, making it heat up more rapidly.
Its not by magic that the heat knows when to sit and when to be picked up, just that the air is hotter on the way up from the heated section, and has cooled a bit at the top before coming back through the regenerator.
 I put the new displacer in its tin can, and threaded its wire through the bottom of the top can that holds the crank shaft.
In the process of de-constructing the first version, I bent the shaft a little, and it never ran quite as smoothly again. The little Stirling engine took a lot more heat to get it going this time, but Im not sure if it was due to the new design of the displacer, or just due to the fact that every thing was a bit warped.
Friction really kills these things, so making sure the shaft is straight is a must.
It does run, and its going a lot faster than the first version, but I suspect that has to do with all the extra heat from using a gas burner rather than a candle, and not some gain in efficiency.
I think I now know a little more about these interesting engines, and a little more about the universe in general, and I think Ill have another go at building a better one. Id really like to make one efficient enough to run on the waste heat from my wireless router so it could just jig around all day for free.
120 Things in 20 years is finding the universe yet more interesting as a result of building this version 2 of my first, working, home made Stirling engine.
0 komentar:
Posting Komentar